How To Do Nail designs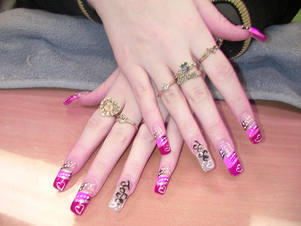
1. Make sure your nails are in good shape. Learn how to keep your nails healthy and have beautiful nails. Your nails should not be bitten. You don't need a manicure to start creating nail art, but you do need to make sure that your nails are clean and shaped well enough that they look even.
Give your nails a base coat. Before you begin your nail art you need to create your canvas. Depending on the look you’re going for, you can paint your nails a neutral color, such as clear, white, pale beige or pale pink, or you can paint them any other color you desire. You may also wish to divide the nail into two or three different colors. Do two coats, as it strengthens the nail and gives a better finish. Make sure your “canvas” is neat and even, and allow it to dry thoroughly before proceeding. Create your nail art on top of the base coat. Dip your brush or other tool in one color of paint to make sure the paint adequately and evenly covers it. If your brush has globs, excess paint, or not enough paint, you’re going to have trouble painting. Keep your art simple. There’s plenty of room for creativity — you can create pictures, abstract designs, etc. to your heart’s content. However, don’t make your nails look too “busy.” Simple designs are often the most beautiful, and if you’re a beginner your chances of success are far greater the simpler your art is. Apply a top coat. Once all your nail art is dry, paint over it with a clear protective acrylic top coat to seal and protect your nail and your hard work. Care for your art. Reapply a clear top coat every two or three days to protect your art and keep your nails looking shiny. Apply cuticle oil daily. Treat your nails with care — wear gloves when gardening or doing other work, and exercise caution when performing tasks such as opening soda cans, as they may damage your nails. |
|
How to do Acrylic Nails.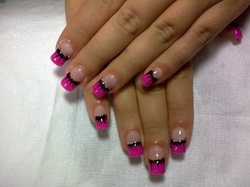
Remove any polish or acrylic from your nails. Clean your nails using the nail brush. Trim your natural nails just back to the skin. You want your natural nails to be trimmed, so that a broken acrylic nail won't rip off your natural nail. Use the nail file to smooth any rough areas and slough off dead skin.
Place a small dab of glue on the tip of the acrylic nails. The glue goes along the center of the nail, from the bottom to the top edge that lines up with your natural nail. Apply the acrylic nails to your natural nails. Trim the nail with a file and smooth it out to the length you want. Place the liquid acrylic in a small dish. Dip your acrylic brush into the liquid acrylic, then wipe it on the side of the bowl. You only need a little liquid acrylic on the brush. Next, touch the tip of the brush to the acrylic powder to create a small acrylic ball. Brush along the edge of your natural nail and the acrylic nail. Work quickly to smooth out the acrylic but don't flatten it. Repeat the application of wet and dry acrylic to create a natural curve to the nail. You'll want to apply one coat to the tip of the acrylic nail for an even look but use a thin coat on the tip. Let the acrylic dry (about 10 minutes) then file and shape the acrylic nail to a natural look. Use the filing block to smooth out the nail as well and the nail brush to sweep away the filings. Apply moisturizing nail oil to your cuticle area. The acrylic and filing tends to dry out nails, so the oil helps moisturize the nail and nail bed. |
How to do French Manicures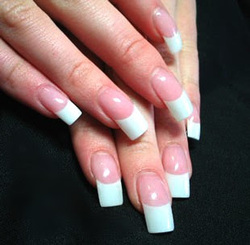
Wash hands and remove old nail polish with an acetone-free polish remover if you have a light shade or an acetone remover for darker shades (acetones can be drying to the nails). Use an orangewood stick with the end covered in cotton and dipped in nail polish remover for the edges if need be. If nails are stained from the previous nail colour.
2.Clip your nails straight across. Grab a file and file in one direction so the corners are slightly rounded. You're trying for a "squoval" shape -- a squared oval shape. Finish off by filing with the fine-grade side. 3.Apply cuticle remover to cuticles (if you have it). See my list of the best cuticle creams. 4.Prepare a nail soak by placing a few drops of jojoba or almond oil (in a pinch, any oils will do) in a bowl of warm water. Soak your hands for 5 minutes in the bowl of warm water. Pat hands dry. 5.Twist a piece of water-moistened cotton onto the end of an orangewood stick. Use it to gently push back your cuticles. Don't cut the cuticles, you can risk nicking the skin (this has happened to me and it is incredibly painful). 6.Exfoliate your hands with a body scrub, rinse and apply hand cream. Apply more cuticle cream to cuticles. Finish this part by taking a cotton ball soaked with nail polish remover to clean nails once again. 7.Start with the pinky finger and apply a thin base coat to all 10 fingers. 8.Using a neutral, pale shade that matches the natural color of the nail bed, paint the nails. Leave to dry. Wait 2 minutes, then re-apply. When painting nails, the thinner the coat, the better. Try wiping one side of the brush on the bottle, then use the other side to paint nails. For best results, apply polish in 3 strokes: Down the center, down one side and then down the other. 9.Paint the naturally white tip of the nail with an opaque white or beige polish. In traditional French manicures, this white strip is straight across the nail, however, if you let the polish curve with your natural nail, your nails will appear longer. Prevent chips by brushing the polish over the edge and wrapping the polish under the nail. 10.Clean up any errant polish with an orange stick wrapped in cotton and moistened with polish remover. 11.Finish with a clear top coat. Let nails dry at least 20 minutes. |
|
|
|
